
Creating a Monorepo with Turborepo for React Native and Next JS
How to create a monorepo with Turborepo with React Native and Next JS, and some limitations to watch out for with these tech stacks.
Table of contents:
Previously at Quantum Mob, I’ve covered what is a monorepo, the advantages of using them, widespread use cases of it, and why I use build tools such as Turborepo when managing a monorepo.
To quickly recap, a popular monorepo use case is hosting cross-platform applications and teams using the same backend and logic. It’s an effective tool for sharing code and avoiding duplication and silos between teams. Particularly, Turborepo greatly advances this idea as a great task runner between packages and by providing dead simple configuration.
In this blog post, I’m going to cover how to create a monorepo with Turborepo with React Native and Next JS, and some limitations to watch out for with these tech stacks. I’ll demonstrate how to run a dev environment and share packages such as utilities, types, and more between the applications. As such, this is an intermediate topic that expects a working understanding of React Native and web applications. By covering these topics, I hope to arm us against weeks of trial and error and come out on top with a solid monorepo boilerplate.
How will we achieve this?
To create a monorepo suitable for React Native + Web, we must do the following:
Install global dependencies
Consider React Native and Next JS limitations
Create and configure Yarn 3 monorepo
Add and configure React Native + web apps
Add shared packages
Set up Turborepo and build scripts
Run dev environments and build for production
As a bonus, I’ve added a completed example of these steps so we can follow along. https://github.com/tkodev/ex-yarn-turborepo-demo
1. Install Global Dependencies
Let’s make sure Node and Yarn are installed.
Assuming we’re using a Mac for this tutorial, as we’ll be using
bashandXcodecommands to manage files, run tasks, build for iOS, etc.Install React Native requirements
Tools required to build
react-native, such asXcode,XCode CLI tools,Cocoapods,watchman,flipper, etc.
Install Node 18 (via node version manager like nvm or fmn if desired)
Enable corepack and yarn
Re-open the terminal and test installation success via
node -v, andyarn -v
2. Consider React Native and Next JS Limitations
This is my proposed directory structure for monorepos with React Native and Next JS 13.
./ex-yarn-turborepo-demo/ ├── apps/ │ ├── react-native/ │ │ ├── node-modules │ │ └── package.json │ └── next-js/ │ ├── node-modules │ └── package.json ├── packages/ │ └── utils/ │ ├── node-modules │ └── package.json ├── node_modules/ ├── .yarnrc.yml ├── package.json ├── README.md ├── turbo.json └── yarn.lock
As one can see, the root of the monorepo has node-modules and package.json, as well as every app and shared package. The problem is, Yarn’s defaults don’t reflect this structure and are incompatible with React Native and Next JS.
Yarn 3, uses the pnp node linker by default, which structures the
node-modulesfolder differently. In addition, yarn will hoist shared node modules between apps and packages to the rootnode_modulesdirectoryIssue: React Native’s Pod files (iOS) and Gradle files (android) import native modules using relative paths to the app directory and are incompatible with these two features. If we don’t disable hoisting and
pnp, the relative import paths will be referencing non-existing modules because they have been hoisted outside of the app directories.Solution: Each app contains its own complete
node_modulesfolder, with no hoisting. Just like a regular repo.
Both Next JS and React Native, will not look for node modules and transpile source files outside of their respective app directories by default.
Issue: We must update
next.config.jsandmetro.config.jsto tell it where to find node modules to use. We’ll override these defaults to allow apps to follow symlinks and transpile shared modules outside of the application folder.Solution:
next.config.jsandmetro.config.jsto be able to import modules from thepackagesdirectory
3. Create and Configure Yarn 3 monorepo
With these limitations in mind, we can use Yarn workspaces to create our basic monorepo structure.
In a fresh repo, run
yarn init -2to install Yarn 3 into our repo.If exists, remove the line for
!.yarn/cachesin the.gitignorefile, as we don’t want to track this in git.Add lines to
.yarnrc.ymlto disable hoisting and use traditionalnode-moduleslinker instead ofpnp{ "name": "@ex-yarn-turborepo-demo/root", "version": "0.0.0", "private": true, "packageManager": "[email protected]", "workspaces": ["apps/", "configs/", "packages/*"], ... }
Configure
package.jsonto add a namespaced name, enable workspaces and other misc flags.{ "name": "@ex-yarn-turborepo-demo/root", "version": "0.0.0", "private": true, "packageManager": "[email protected]", "workspaces": ["apps/", "configs/", "packages/*"], ... }
Going forward, each app and package added needs a namespaced
name,version, andprivate: true(this avoids accidental publishing to the public npm registry)
Congrats! We now have a monorepo, ready for new apps and packages!
4. Add and Configure React Native + Web apps
Now that we have a monorepo structure, we can begin to add applications
Application directories can be copied into the
./appsfolder.In this case, we will use React Native and Next JS’s boilerplate generator commands
Add a Typescript Next JS app
(cd apps && npx create-next-app@latest --ts web-next)Add a Typescript React Native app
(cd apps && npx react-native init mobile-rn --template react-native-template-typescript)
Just like with the monorepo root, we want to add a namespaced
name(such as"name": "@ex-yarn-turborepo-demo/react-native"),version, andprivate: trueto each app’spackage.jsonfilesNext, we’ll configure React Native’s
metro.config.jsto address the limitations mentioned in the above section. To do this, we’ll ensure the monorepo root and React Native’snode_modulespaths are watchedconst { resolve } = require('path');
const rootPaths = [resolve(__dirname), resolve(__dirname, '../..')]; const nodeModulesPaths = rootPaths.map(rootPath => resolve(rootPath, 'node_modules'), );
module.exports = { ... watchFolders: rootPaths, resolver: { nodeModulesPaths: nodeModulesPaths, }, }
Likewise, we’ll configure Next JS 13’s
next.config.jsto transpile all@ex-yarn-turborepo-demonamespaced packages found in itspackage.jsondependencies field.cd apps/next
/** @type {import('next').NextConfig} */
const { dependencies } = require('./package.json')
// init const transpilePackages = Object .keys(dependencies) .filter((dependency) => dependency.includes('@ex-yarn-turborepo-demo/'))
// main const nextConfig = { reactStrictMode: true, swcMinify: true, transpilePackages }
// export module.exports = nextConfig
Lastly, we’ll want to remove any
./apps/**/.gitfolders and./apps/**/package-lock.jsonfiles created by the boilerplate commands by runningrm -rf ./apps/*/.git&&rm -rf ./apps/*/package-lock.jsonWe remove
.gitfolders to avoid having nested git metadata, this is a single repo with single git history after all.We remove
package-lock.jsonbecause yarn already has a lock file in the root of our monorepo
We should now have two applications hosted in our monorepo!
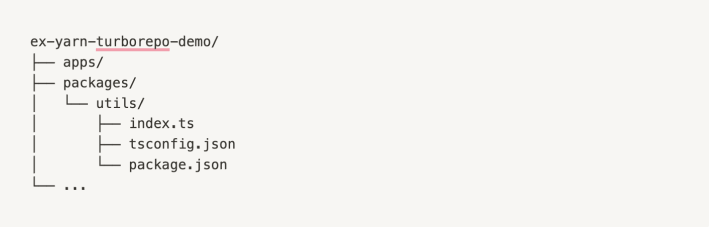
5. Add Shared Packages
With applications added to our repo, let’s utilize the power of Yarn Workspaces by adding a simple typescript package and importing it into both apps. See git repo's utils for an example.
Install this package in our app
(cd apps/react-native && yarn add @ex-yarn-turborepo-demo/utils@workspace:^) (cd apps/next && yarn add @ex-yarn-turborepo-demo/utils@workspace:^)
Import this package into our apps
import { exampleExport } from '@ex-turborepo-demo'
That wasn’t so hard, importing shared packages is easy with Yarn 🙂
6. Set Up Turborepo and Build Scripts
At this point, we have a solid foundation to work off of: A monorepo with two apps and a shared package, let’s configure the scripts required for dev environments, building and starting the app.
This is where Turborepo shines.
It can detect our dependency tree based on our imports and build/run scripts accordingly.
Add
turboto monorepo root usingyarn add -D turboAdd a
turbo.jsonfile at the base of your new repository:Ensure
turbo.jsonhasdev,buildandstartpipelines. Pipelines tell Turborepo what yarn scripts are available to run in each app and package.{ "$schema": "https://turborepo.org/schema.json", "pipeline": { "dev": { "cache": false }, "build": { "dependsOn": ["^build"], "outputs": ["dist/", ".next/"] }, "start": { "dependsOn": ["build"] }, "test": { "cache": false }, "lint": { "cache": false } } }
Notice that
buildandstarthave adependsOnpropertyThis is key:
The value
["^build"]with the^character, means to run all existingbuildscripts in the dependency tree. It will traverse up the dependency tree, building from the extremities, and finally the current app’sbuildscript.The value
["build"]without the^character, means to make sure only thebuildscript of the current application has run before starting this pipeline.
Tip: we add this
^character to enable this traversing behaviour in any script, such as^dev
We’ll have to ensure each app in the
./appsfolder has a yarn script withdev,build, andstart. Please see git repo’s ./apps for an example. In essence, these represent the dev environment, build task and start the task of each of our apps. Scripts in our package.json for React Native could look like this:{ ... "scripts": { "postinstall": "(cd ios && pod repo update && pod install)", "dev": "react-native run-ios", // run-android if on wi "build": "echo 'no build yet'", "start": "react-native start --reset-cache", ... }, ... }
We’ve added one more script for
postinstallthat ensures the React Native’s cocoa pods (iOS native modules) are installed whenever we runyarn install
7. Run Dev Environments and Build for Production
Finally, we’re at the stage where we can preview our work. Pat ourselves on the back for following all these steps! 🙌
Install all app & package dependencies and native modules using
yarn installOur browser and iOS emulator should pop up after some time with our apps loaded.
If Xcode errors occur in the console, make sure our Xcode project and emulator are set up
If the browser doesn’t open, open
[localhost:3000 (manually in our browser
Run all app’s dev environments using
yarn devUpdate and save code in our shared module, changes will propagate and build automatically.
Run
yarn buildto build bundles for production.
That’s it! With this setup, we can quickly write code in one repo that is shared between multiple apps. We’re set to explore extended features of React Native, Next, the Vercel Turborepo stack such as remote caching, pruning, parallel builds, and so on.
Conclusion
To recap, I covered how to create a monorepo with Turborepo for React Native and Next JS, went over limitations to watch out for with these tech stacks, demonstrated how to run a dev environment, and shared packages such as utilities, types, and more between the applications. Ideally, with this documentation of edge cases and core concepts, we’re able to easily start a project with a solid boilerplate for monorepos with Turborepo, without falling into common pitfalls.
Resources
Example repo: https://github.com/tkodev/ex-yarn-turborepo-demo
Expo adaptations: How to adapt Expo to support monorepos
Turborepo reference: Turborepo quick start

Enjoyed this post?


Newsletter Sign-up
Receive summaries directly in your inbox.


